Reordering and configuring fields
Last updated:
What you'll learn
- Learn how to add, reorder, and delete fields.
- See how to set a field’s label, required status, and other options.
- Understand that changes do not reach the form until you save.
Open the Fields tab
You add and edit fields on the Fields tab of the form editor.
- Open Inquiry Management → Form Builder, then click “Edit” on the form you want to change.
- Choose “Fields” from the tabs at the top of the editor.
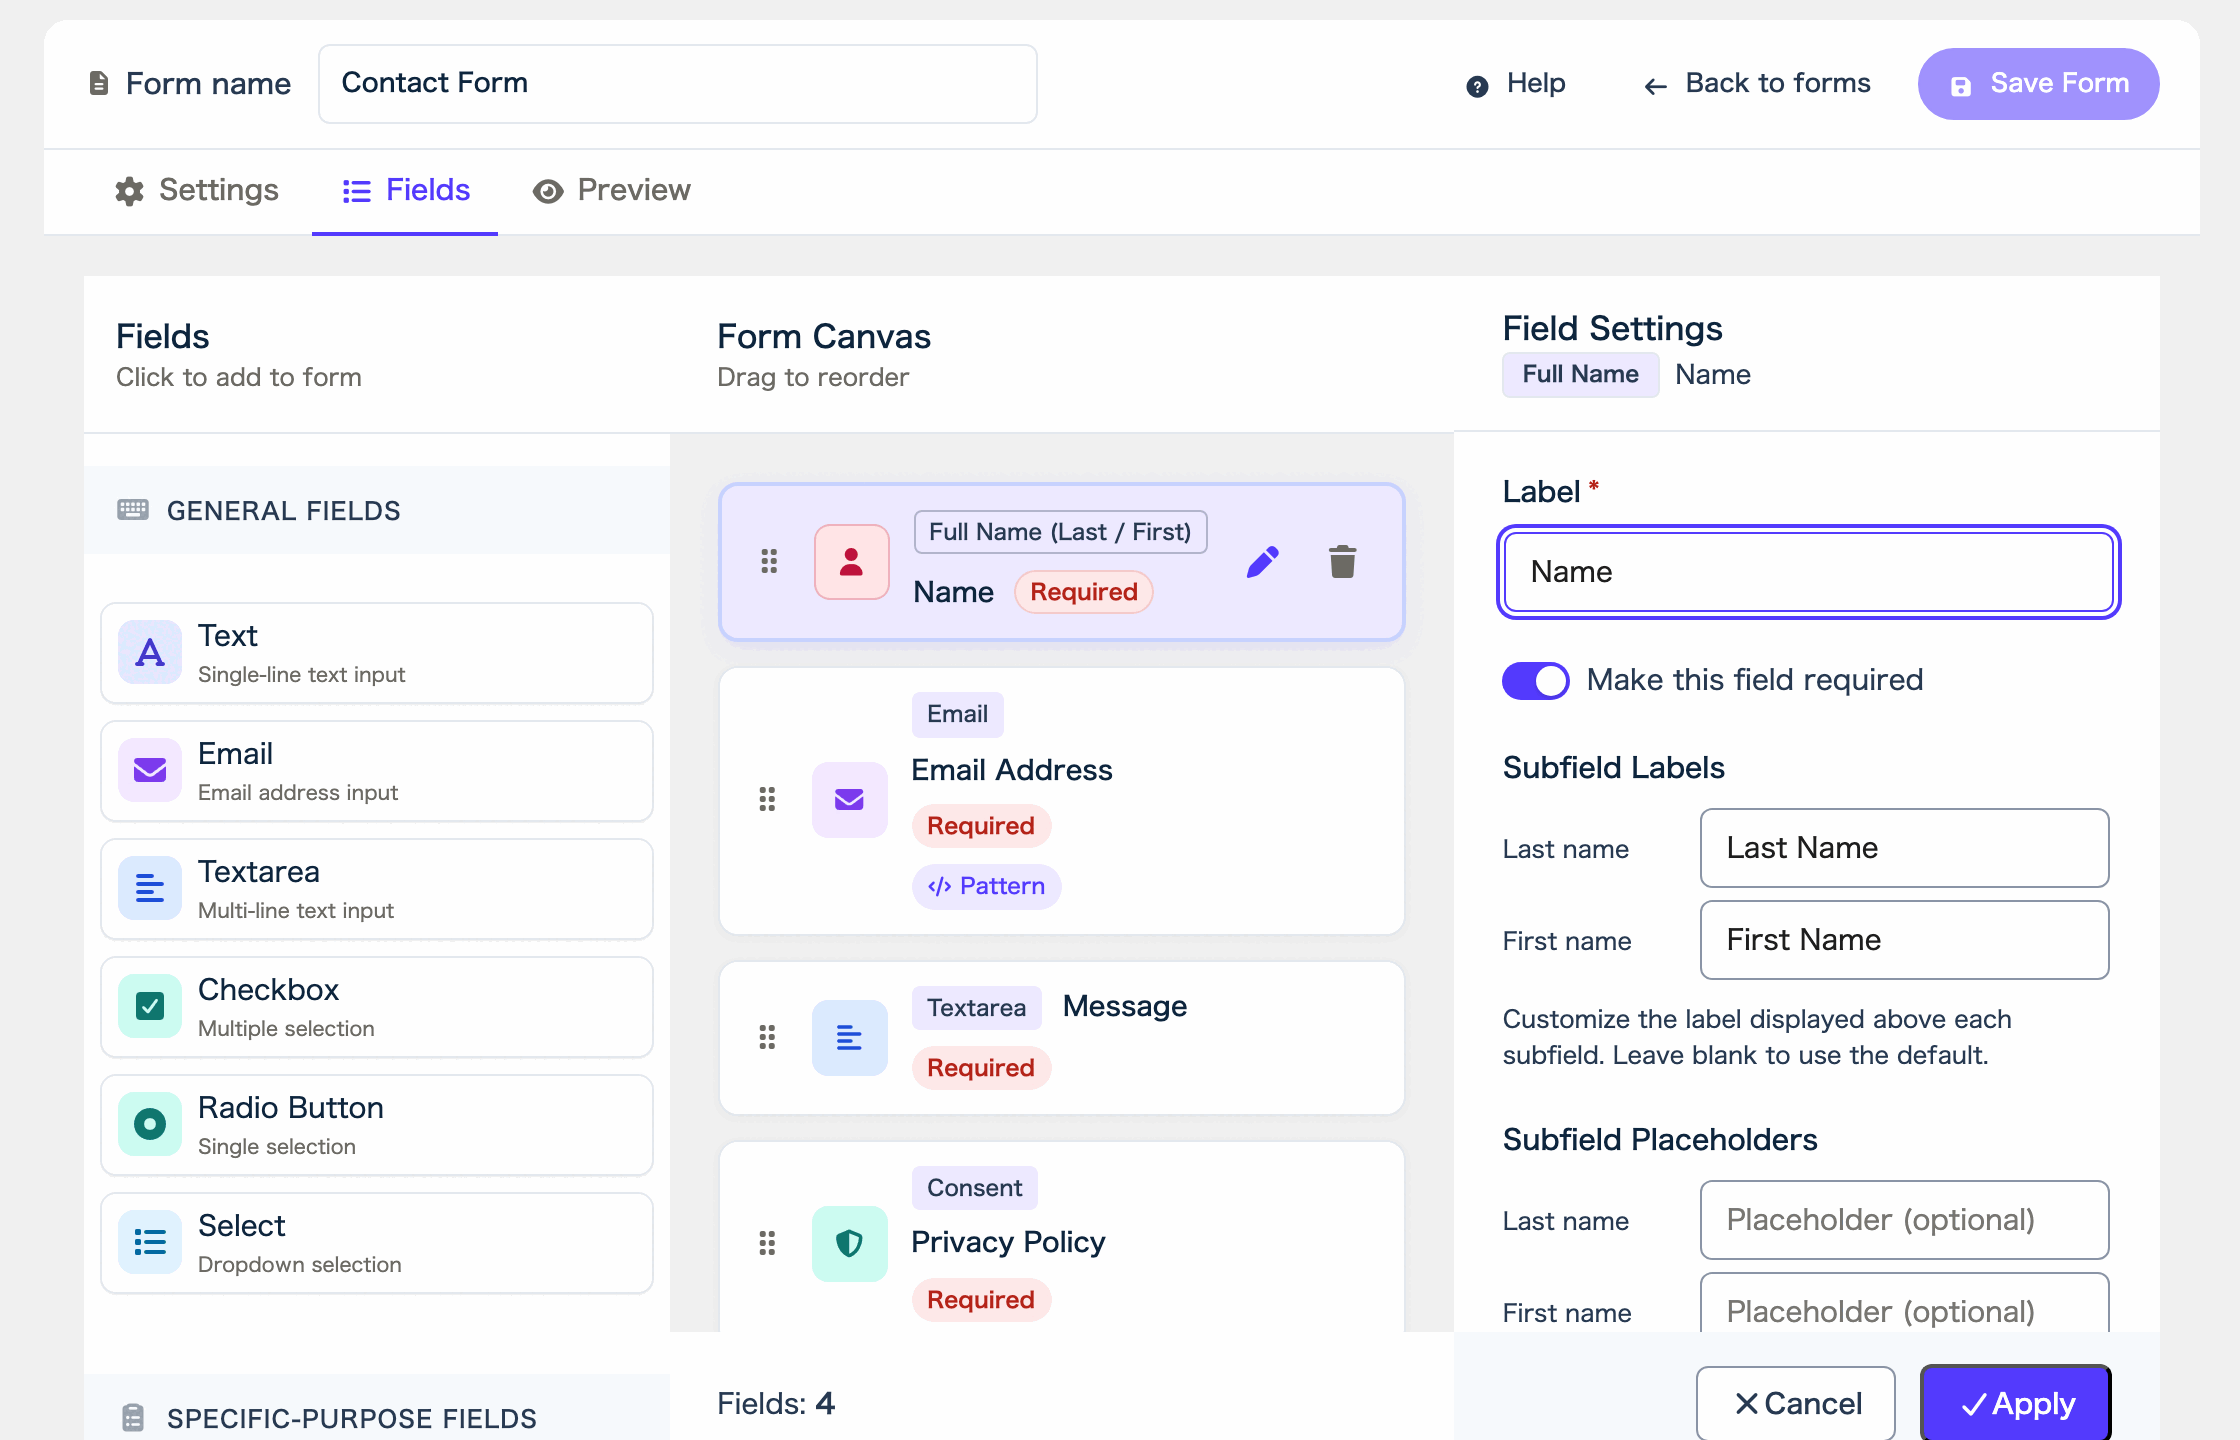
The screen has three parts. Choose a field from the palette on the left, arrange it on the Form Canvas in the middle, and adjust its details in Field Settings on the right.
The first time you open the editor, a tour walks you through the screen. To see it again, click “Help” at the top of the screen.
Add a field
- In the palette on the left, find the field you want to add. Field types describes each one.
- Click the field. The palette says “Click to add to form”.
- The field is added to the bottom of the Form Canvas.
Reorder fields
You can drag the fields on the Form Canvas to change their order.
- Press and hold the handle at the left edge of a field, then drag it to the position you want. The handle is labeled “Drag to reorder”.
- Release the mouse button where you want the field to go.
Change a field’s settings
- On the Form Canvas, click the field you want to change. You can also click the pencil button on the right of the field (“Edit field”).
- Change the details in Field Settings on the right.
- Click “Apply”. The change appears on the Form Canvas.
These are the main things you can change in Field Settings.
- “Label”: the name of the field. It is required, and you cannot apply the changes while it is empty.
- “Placeholder”: the example text shown faintly inside the input.
- “Default Value”: the value the field starts with.
- “Make this field required”: when checked, visitors cannot submit the form with this field empty.
- “Options”: the choices for Select, Radio Button, and Checkbox fields. Click “+ Add option” to add more.
- “Validation Rules”: checks on what visitors enter. You can set “Minimum Length” and “Maximum Length” on Text, Textarea, and Phone Number fields. You can set “Regular Expression Pattern” on Text fields.
The settings you see depend on the field type. For example, “Full Name” has “Subfield Labels”, “Name Furigana” has “Character type”, and “Consent” has “Consent Text” and “Privacy Policy URL”.
To stop editing, click “Cancel”. The changes you were making do not reach the form.
Delete a field
- Click the trash button on the right of the field you want to remove (“Delete field”).
- “Confirm Field Deletion” appears, and tells you “This action cannot be undone.”
- If you want to remove the field, click “Delete”.
Save your changes
Adding, reordering, changing, and deleting fields are not stored until you save. When there are changes, the top of the screen shows “Unsaved changes”.
When you finish editing, click “Save Form” at the top right. After saving, the screen shows “Saved”. Previewing, publishing, and saving drafts explains how to publish.
FAQ
- What happens if I click “Save Form” without clicking “Apply”?
- The changes you were making in Field Settings are applied first, and then the form is saved.
- How do I stop changing a field’s settings?
- Click “Cancel” in Field Settings. The changes you were making do not reach the form.
- Can I see the guided tour again?
- Yes. Click “Help” at the top of the editor, and the tour appears again.
Related articles
Formii is free to get started
The confirmation screen and inquiry management are included in the free version.