How to choose the page shown after submission
Last updated:
What you'll learn
- Learn how to set what visitors see after they submit a form.
- See the difference between showing a message on the same page and sending visitors to a dedicated page.
- Understand why to place the “formii_notice” shortcode on the destination page.
What is shown after submission?
You can choose, for each form, what visitors see after they submit it. There are two options.
- “Display message on same page” replaces the form with a completion message on the page that holds the form.
- “Redirect to dedicated page” sends visitors to another page, such as a thank-you page.
If you change nothing, the form uses “Display message on same page” and shows “Thank you for your inquiry.”
Show a message
- In the WordPress admin, open Inquiry Management → Form Builder.
- Click “Edit” on the form you want to set up.
- Choose the “Settings” tab at the top.
- In “Thank You Page Settings”, choose “Display message on same page” under “Display Method”.
- Type the text you want to show in “Completion Message”.
- Click “Save Form” at the top right.
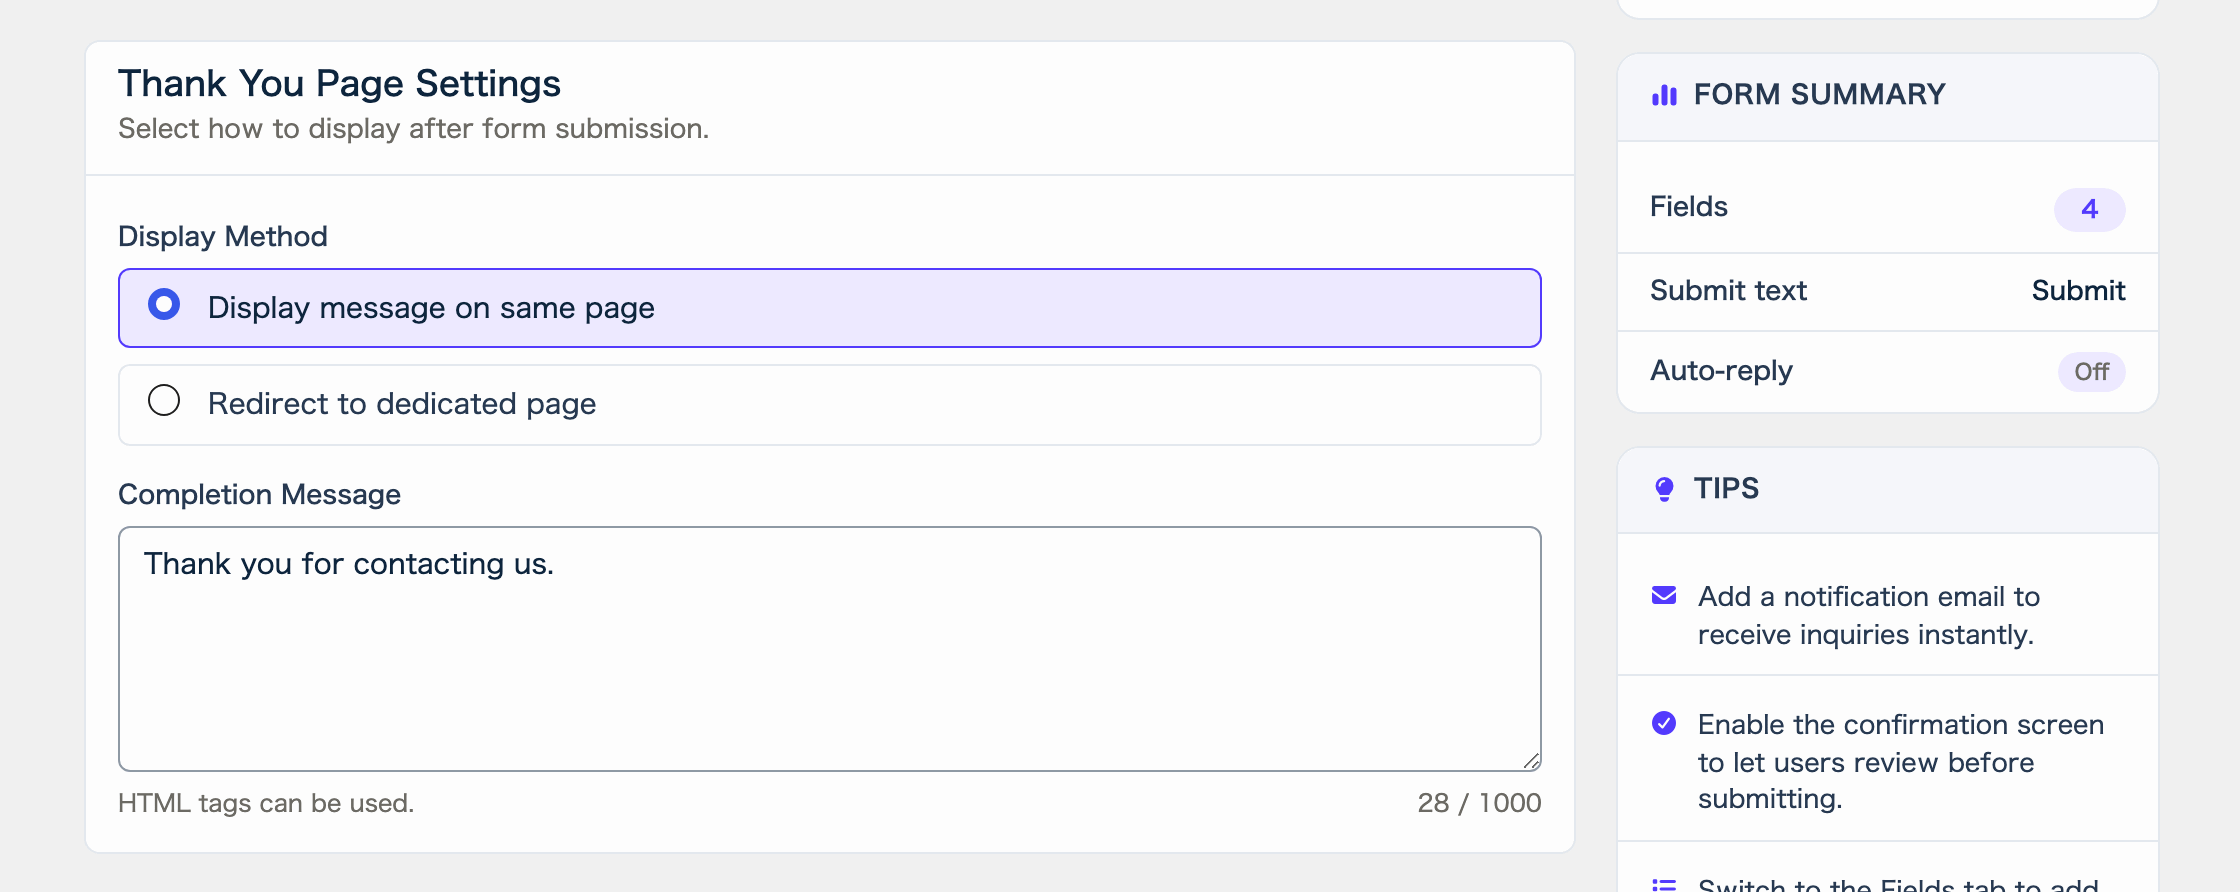
The completion message can be up to 1000 characters. You can use HTML tags in it.
Send visitors to a dedicated page
If you want a separate thank-you page, create the destination page first. Then change the form’s setting.
- Create and publish the destination page in WordPress. For example, create a “Thank you for contacting us” page under Pages.
- In the form editor, open the “Settings” tab.
- In “Thank You Page Settings”, choose “Redirect to dedicated page” under “Display Method”.
- Enter the URL of the destination page in “Redirect URL”.
- Click “Save Form” at the top right.
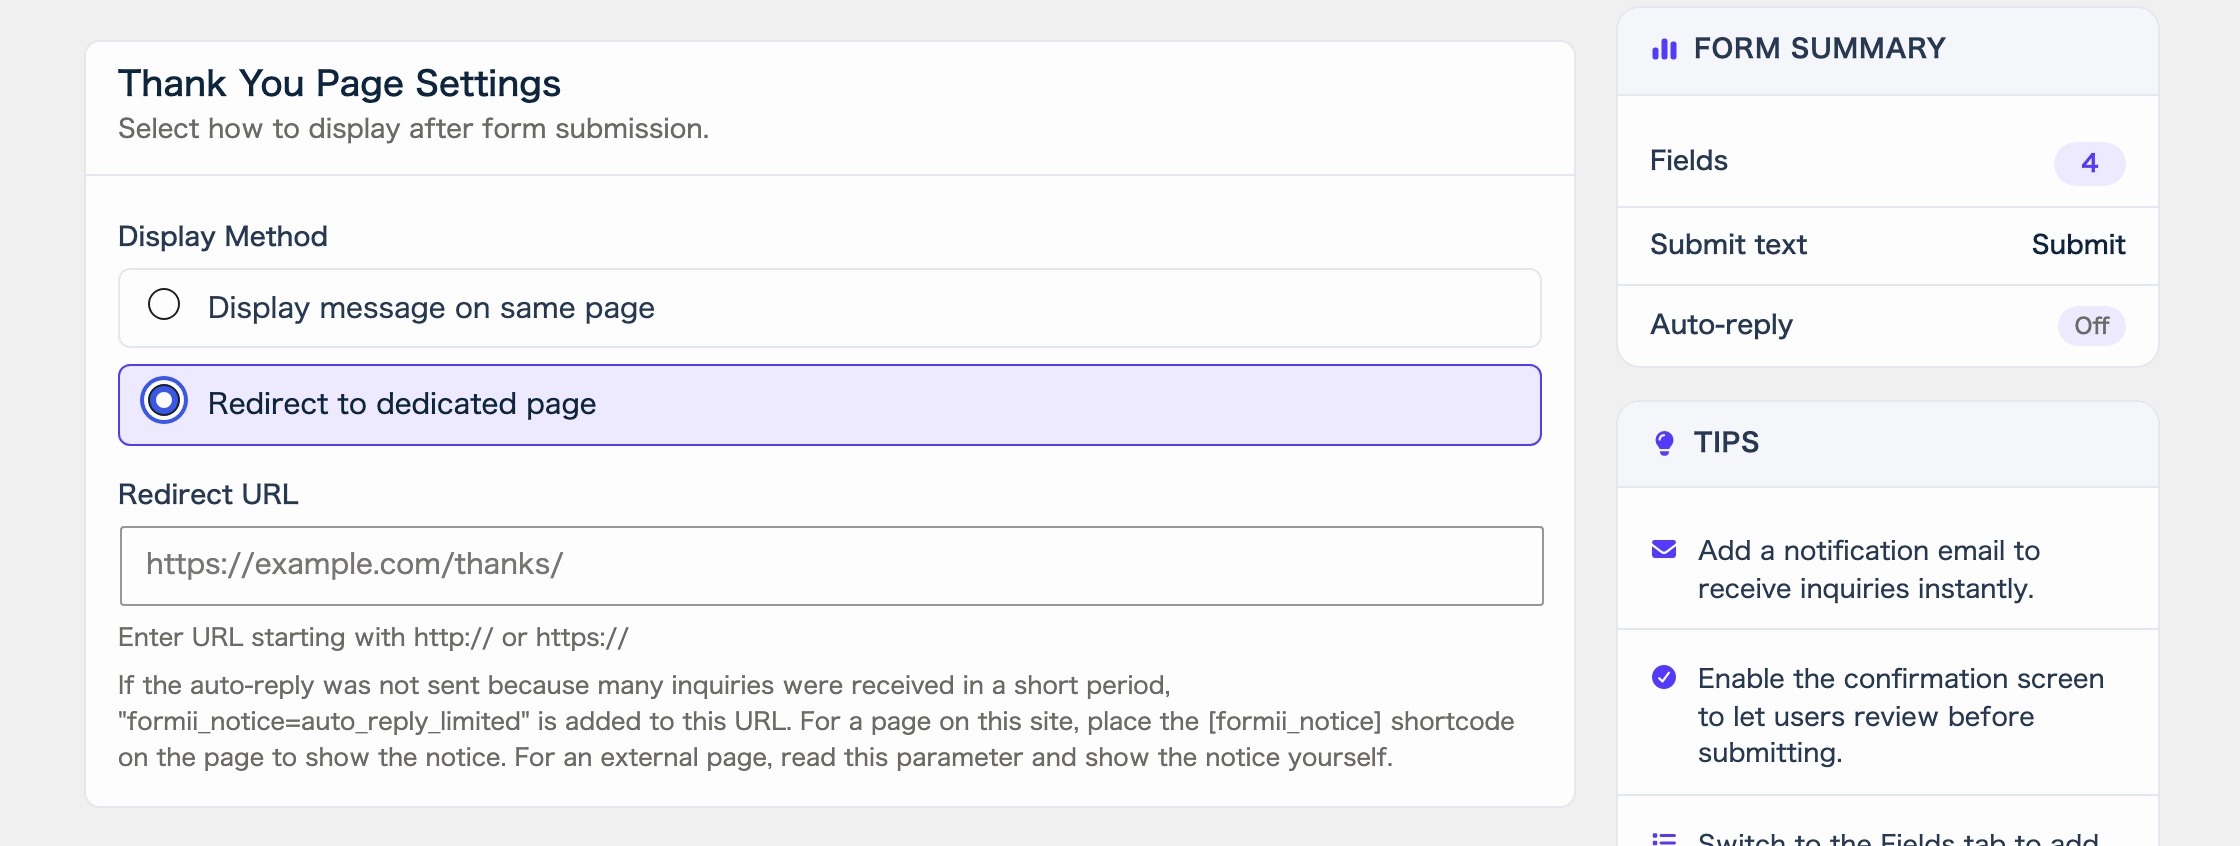
Enter a URL that starts with “http://” or “https://”. The field’s help text says “Enter URL starting with http:// or https://”.
If the URL is not valid, visitors are not moved. They see the completion message on the same page instead. After you set it up, submit the form yourself to check that the redirect works.
Place “formii_notice” on the destination page
If the destination is a page on your own site, we recommend placing the [formii_notice] shortcode on it.
Auto-reply emails have a sending limit. The shortcode lets you tell visitors when the limit was reached and no auto-reply was sent. Auto-reply emails explains the limit.
- When no auto-reply was sent, Formii adds “formii_notice=auto_reply_limited” to the destination URL.
[formii_notice]reads it and shows this notice: “Your inquiry has been sent. However, because many inquiries were received in a short period, the confirmation email (auto-reply) was not sent for security reasons.” - When an auto-reply was sent, or the form does not use one, the shortcode shows nothing.
You place it the same way as in Adding a form with a shortcode. Paste [formii_notice] near your thank-you text on the destination page.
If the destination is a page on another site, [formii_notice] does not work there. If you need the notice, read the “formii_notice” value from the URL on that page and show it yourself.
FAQ
- I changed the completion message, but it does not appear.
- Check that you clicked “Save Form” in the form editor. Settings do not take effect until you save.
- Can I show the visitor’s inquiry on the destination page?
- No. The only thing passed to the destination page is a marker for when no auto-reply was sent. Write the thank-you text on the destination page yourself.
- Is it a problem if I do not place “formii_notice”?
- No. It does not affect receiving inquiries or notification emails. Without it, visitors are simply not told that no auto-reply was sent.
Related articles
Formii is free to get started
The confirmation screen and inquiry management are included in the free version.