How to set up auto-reply emails
Last updated:
What you'll learn
- Learn how to automatically send a confirmation email to the person who submits a form.
- See how to change the subject, heading, body, and closing to your own words.
- Understand how the recipient and the sender are chosen.
What is an auto-reply email?
An auto-reply email is a confirmation that reaches the person right after they submit a form. It tells them their inquiry was received and shows what they sent.
Auto-reply emails are available in the free version. You choose whether to use one for each form.
The email that goes to the site owner is covered in Notification emails.
Turn on the auto-reply email
- In the WordPress admin, open Inquiry Management → Form Builder.
- Click “Edit” on the form that should send an auto-reply.
- Choose the “Settings” tab at the top.
- Turn on the “Send auto-reply email” switch. The help text under it says “Send an auto-reply email to the sender”.
- Click “Save Form” at the top right.
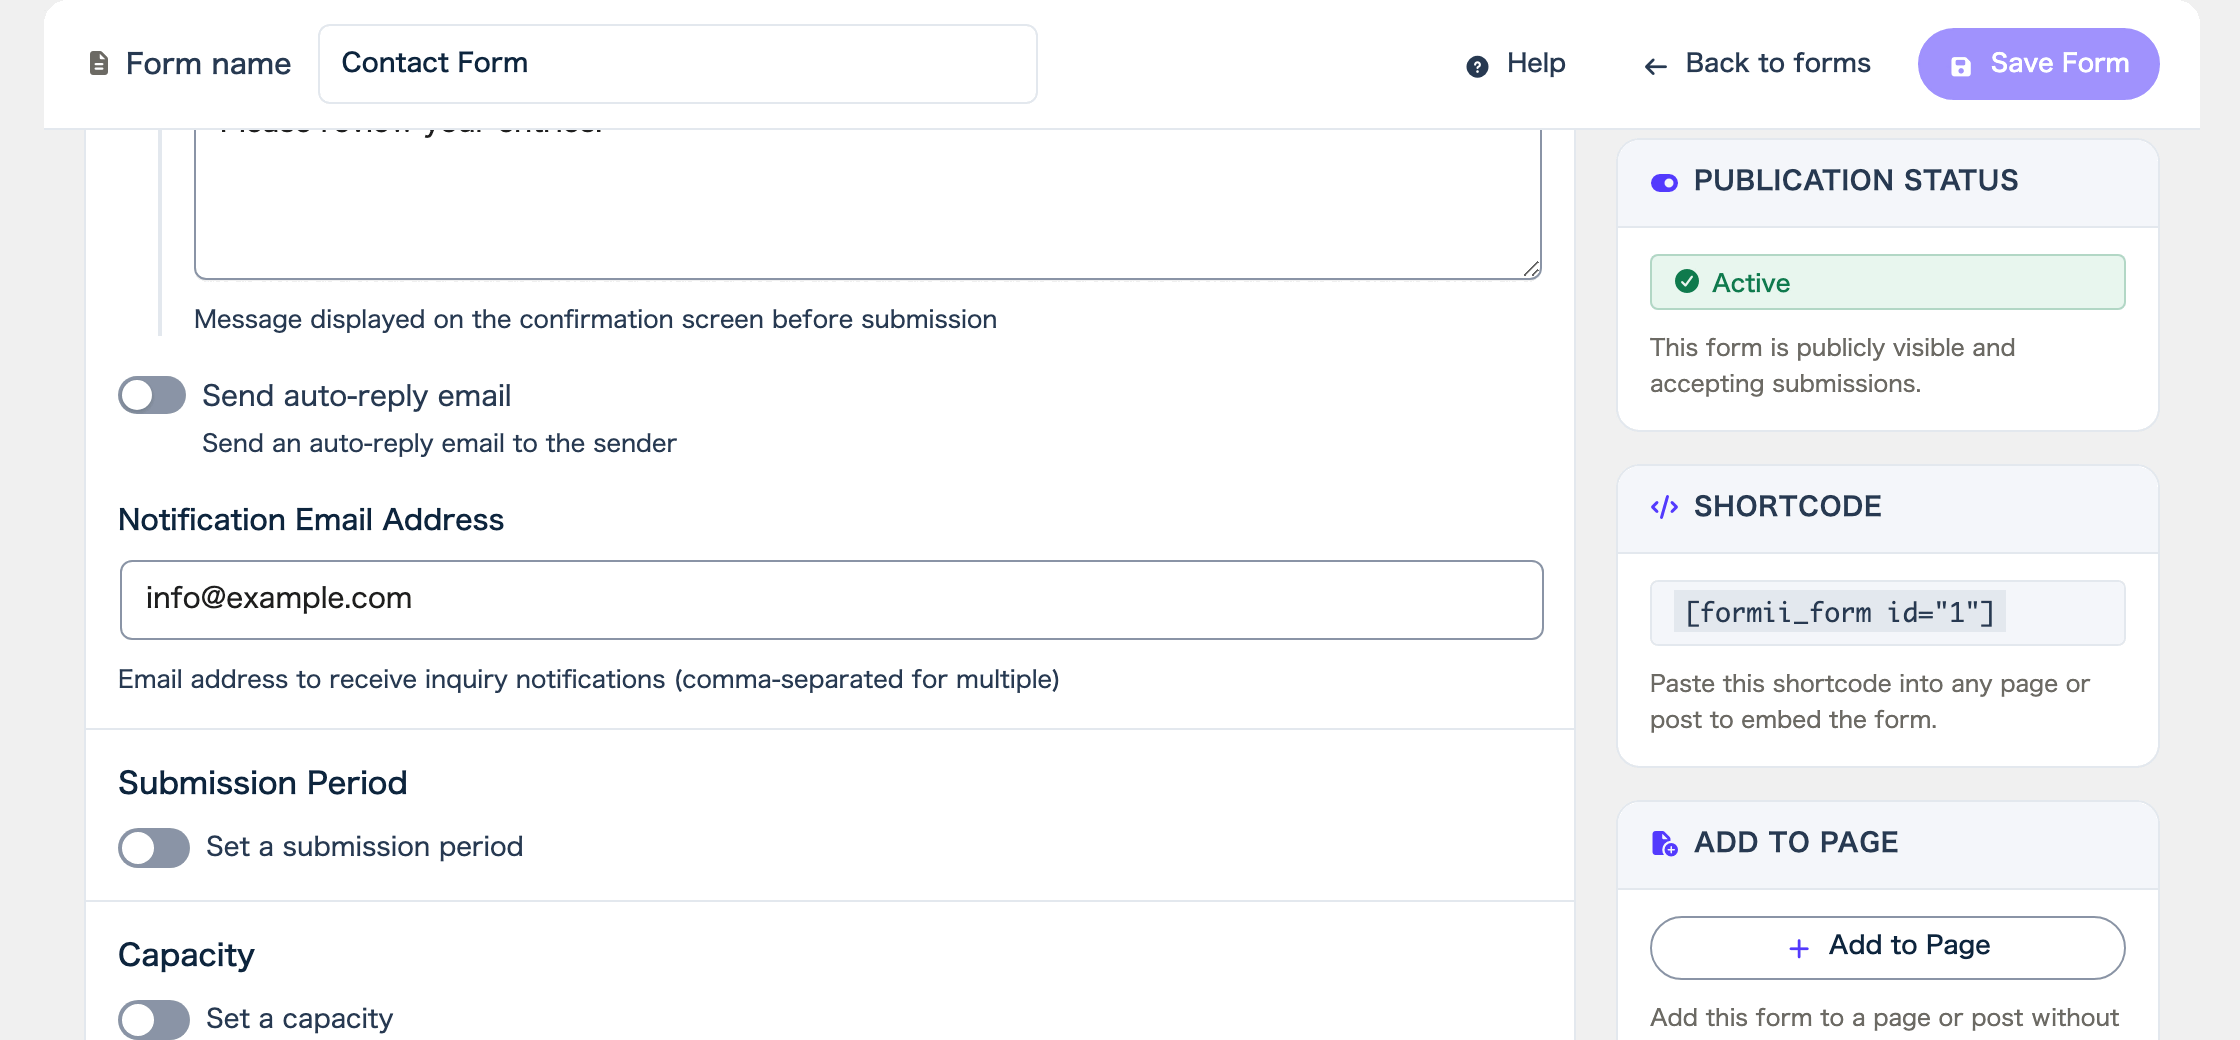
After you turn it on, input fields for the subject, heading, body, and closing appear. You can leave every field empty. When a field is empty, Formii sends the email with its default text.
Set the content of the email
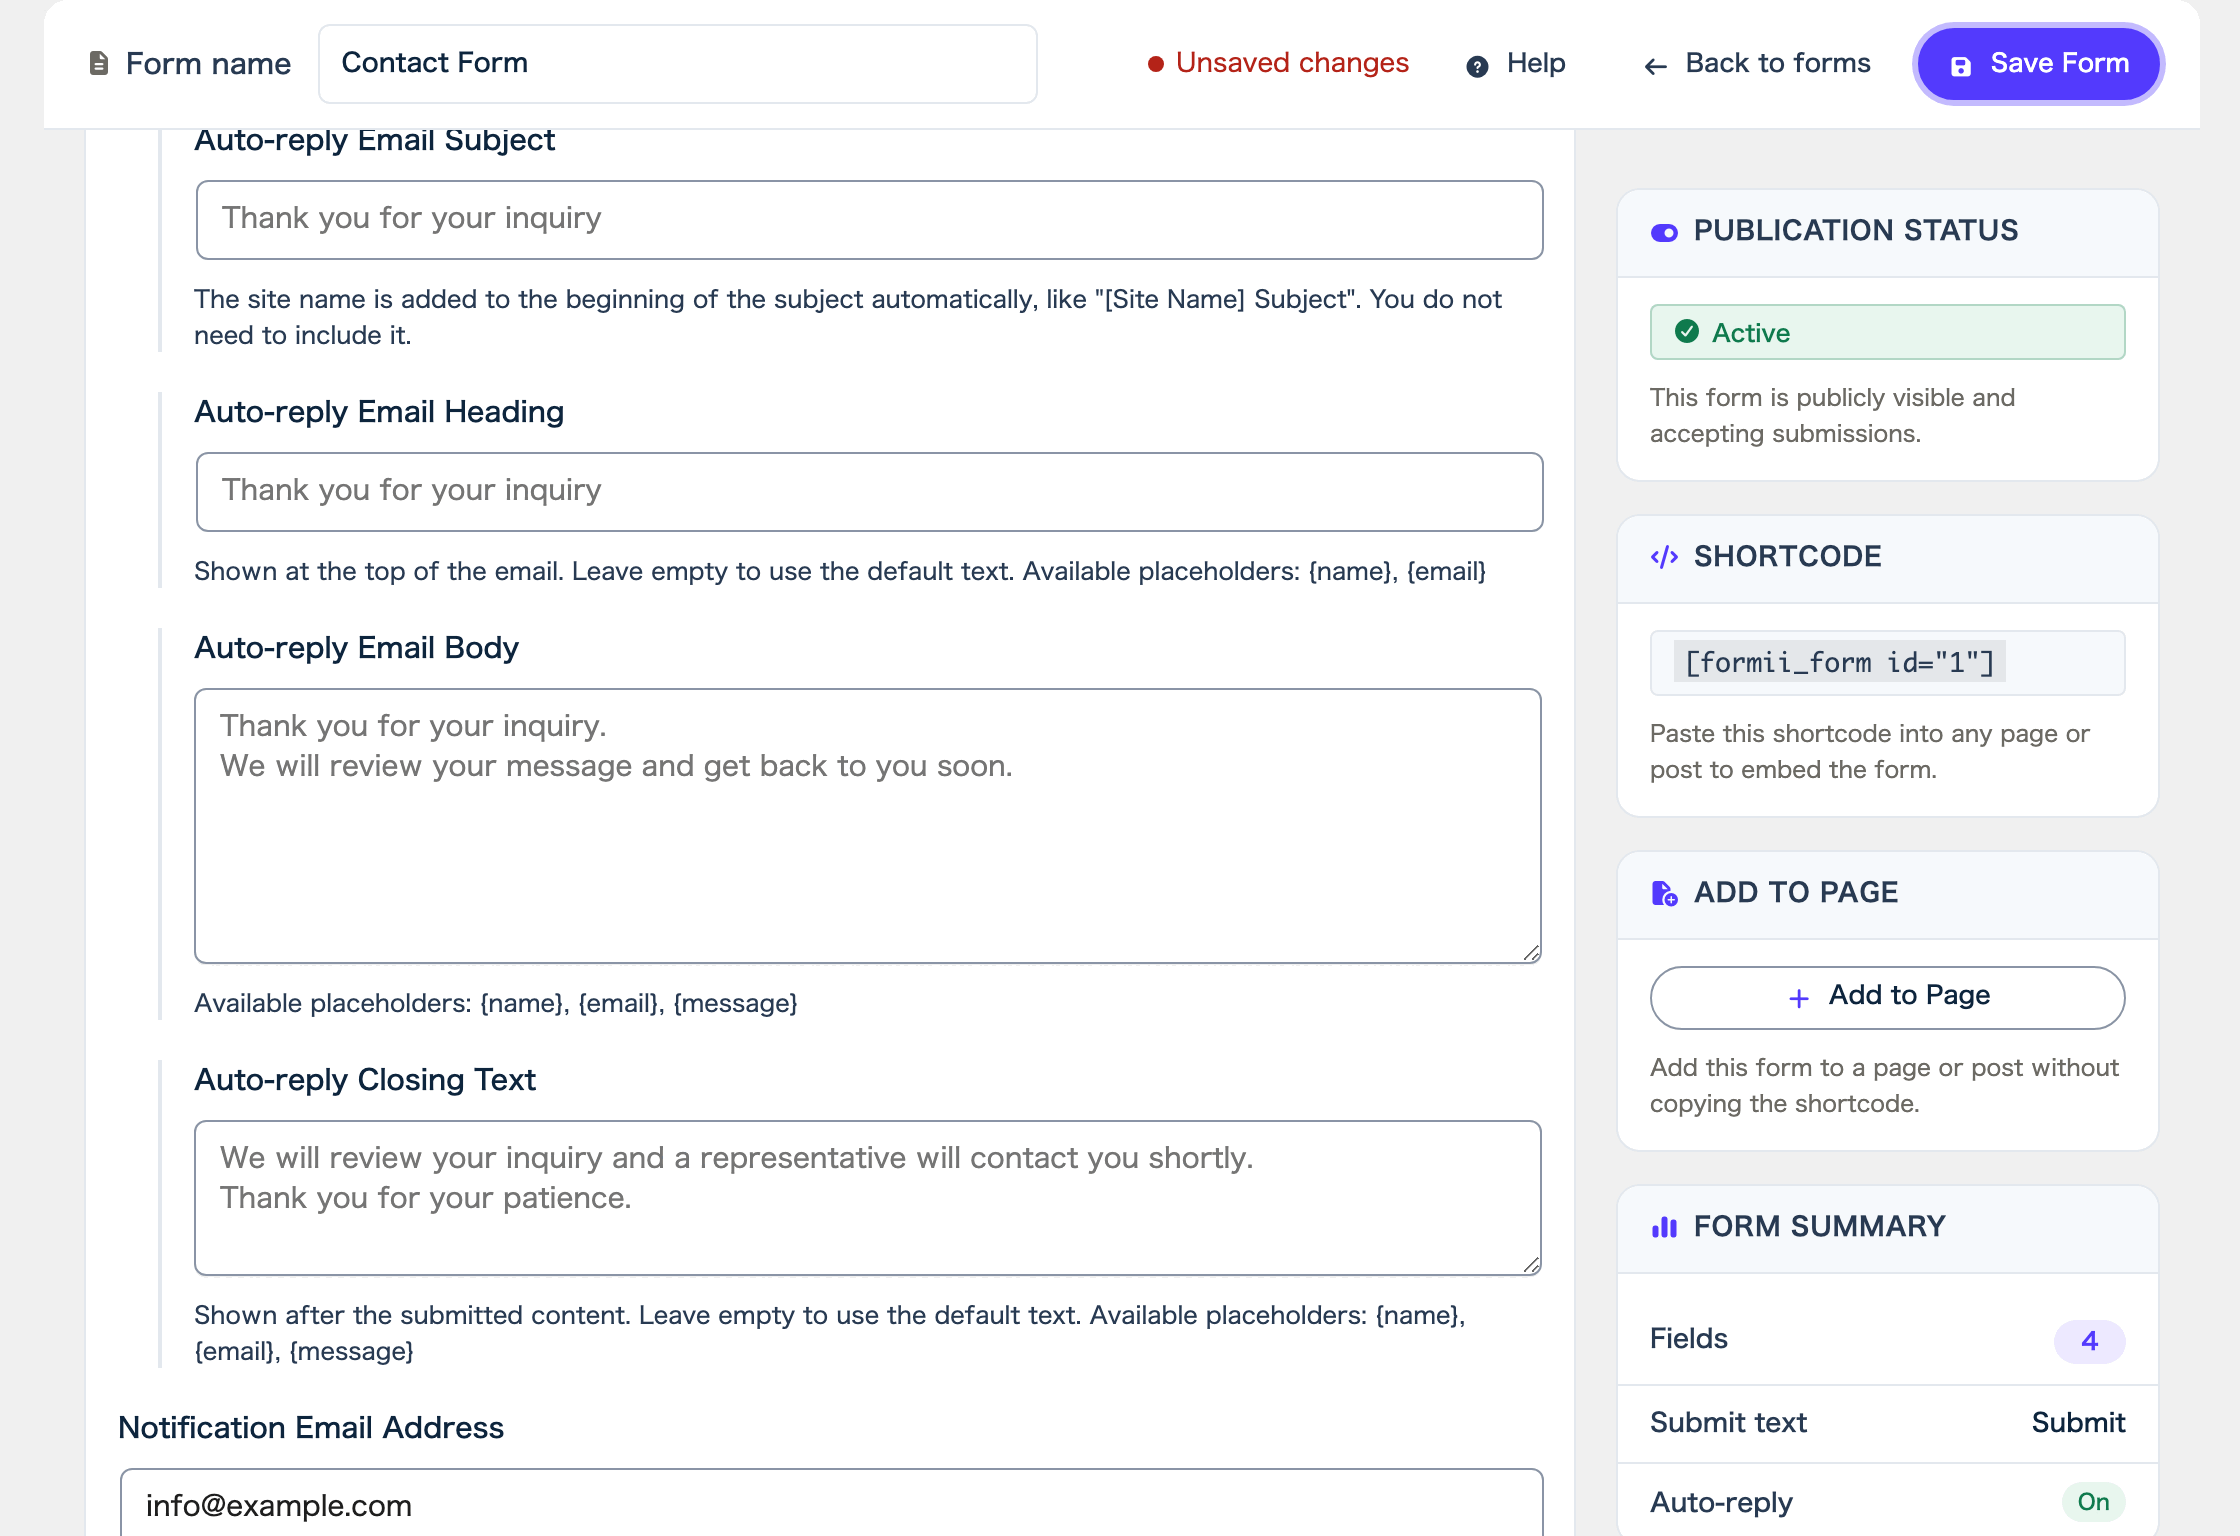
After you turn on “Send auto-reply email”, these four fields appear.
- “Auto-reply Email Subject” is the subject line. Formii adds the site name to the start automatically, like “[Site Name] Subject”, so you do not need to type it. When the field is empty, the subject is “Thank you for your inquiry”.
- “Auto-reply Email Heading” appears at the top of the email. When it is empty, Formii uses its default text.
- “Auto-reply Email Body” is the text shown before the submitted content.
- “Auto-reply Closing Text” is shown after the submitted content. When it is empty, Formii uses its default text.
Besides these texts, the email also includes a list of what the visitor submitted and a reference number.
Insert the sender’s name and more
You can use these placeholders in the heading, body, and closing. They are replaced with real values when the email is sent.
- {name}: replaced with the sender’s name. The name is the value entered in the form’s first single-line text field.
- {email}: replaced with the sender’s email address.
- {message}: replaced with what was entered in the form’s first multi-line field. You can use it in the body and closing.
For example, if the body says “Dear {name}, thank you for contacting us.”, the visitor receives “Dear Taro Yamada, thank you for contacting us.”
Where the auto-reply is sent
The auto-reply goes to the email address the visitor entered. Your form needs an email field for this.
If the form has more than one email field, the first one is used. If no email address was entered, Formii does not send an auto-reply.
To add a field, see Field types.
Choose the sender
You choose the sender of auto-reply emails on the Settings screen.
- In the WordPress admin, open Inquiry Management → Settings.
- In “Basic Settings”, enter the sender you want in “Sender Email Address” and “Sender Name”.
- Click “Save changes”.
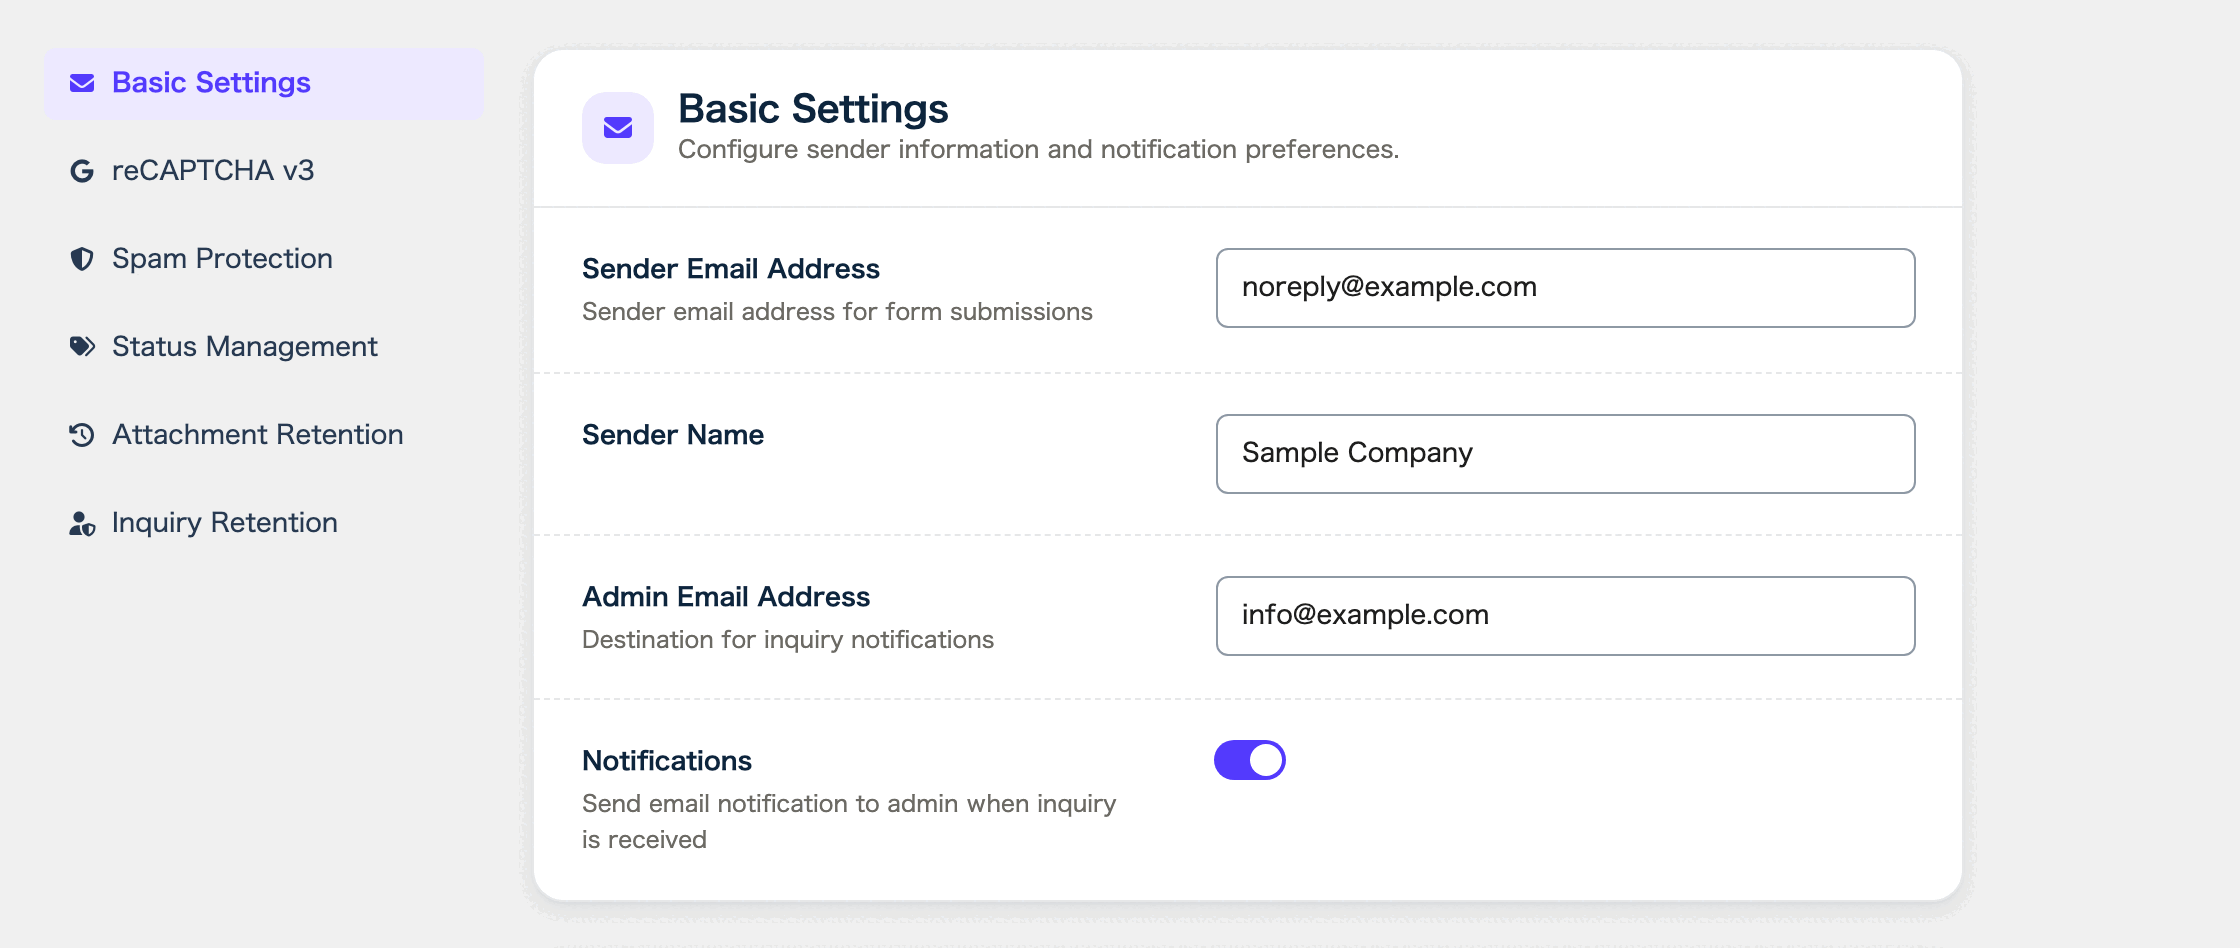
If you leave “Sender Email Address” empty, Formii uses the administrator’s email address registered in WordPress. If you leave “Sender Name” empty, it uses the site name.
The sender address also affects whether your email lands in spam. See What to do when notification or auto-reply emails do not arrive for which address to use.
Auto-replies have a sending limit
Anyone can enter any email address in a form. To keep auto-replies from being used to send unwanted email to other people, Formii limits how many it sends.
By default, the limit is 10 per day to the same address and 200 per hour for the whole site. When a limit is reached, Formii still accepts the inquiry and still sends the notification email. Only the auto-reply is skipped.
In that case, a notice says the auto-reply was not sent. When the form is set to “Display message on same page”, the notice appears together with the completion message. When it is set to “Redirect to dedicated page”, the notice appears only if you placed [formii_notice] on the destination page. See Choosing a page to display after submission for details.
FAQ
- A visitor says they did not receive the auto-reply.
- First, check that “Send auto-reply email” is turned on for that form. Next, check that the form has an email field. The email may also be in their spam folder.
- Can I use the auto-reply without changing its content?
- Yes. Just turn on “Send auto-reply email”, and Formii sends it with the default text.
- Can each form have a different auto-reply?
- Yes. The subject, heading, body, and closing are set for each form. The sender you choose on the Settings screen is used for all forms.
Related articles
Formii is free to get started
The confirmation screen and inquiry management are included in the free version.