Creating a form
Last updated:
What you'll learn
- Learn how to create a new form.
- Understand the difference between “Start with common fields” and “Start from a blank form”.
- See that a new form starts as a draft.
Open the Forms list
You create forms from the Forms screen.
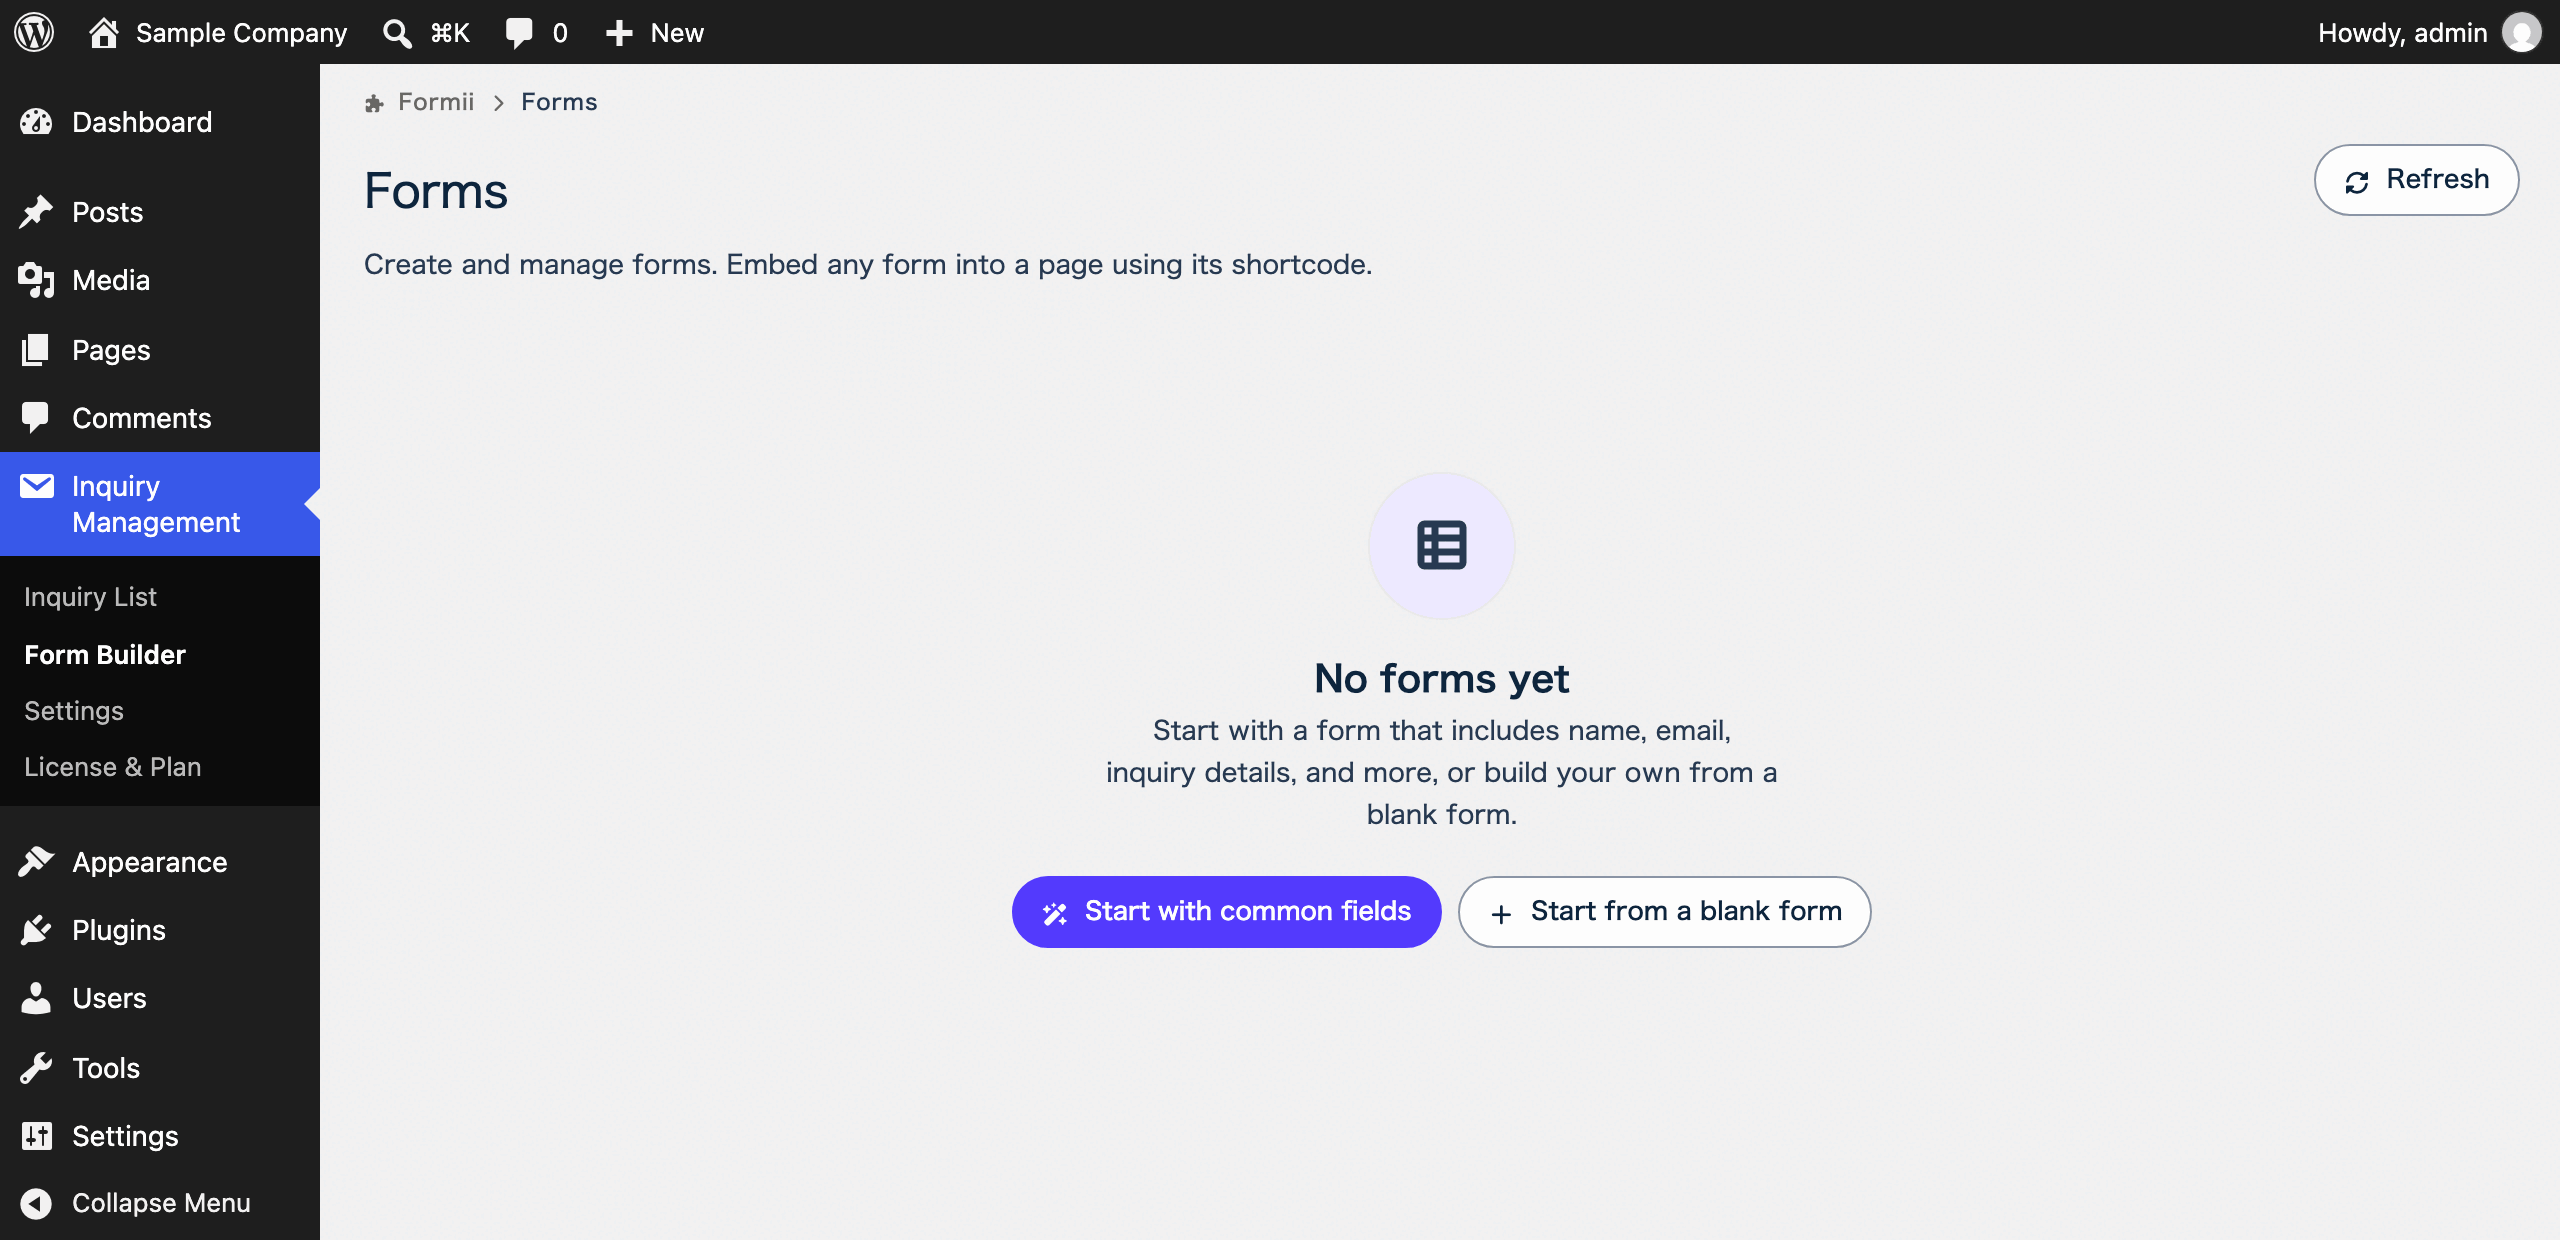
- In the WordPress admin, open Inquiry Management → Form Builder from the left menu.
- The Forms screen opens.
Choose how to create the form
You can create a form in one of two ways.
- “Start with common fields” creates a form that already has fields such as name, email, and inquiry details. It suits a quick contact form.
- “Start from a blank form” creates a form with no fields. You add the fields yourself afterwards.
- If you have no forms yet, the create buttons appear in the middle of the screen. If you already have forms, click “New Form” at the top right.
- Choose “Start with common fields” or “Start from a blank form”.
- The form editor opens.
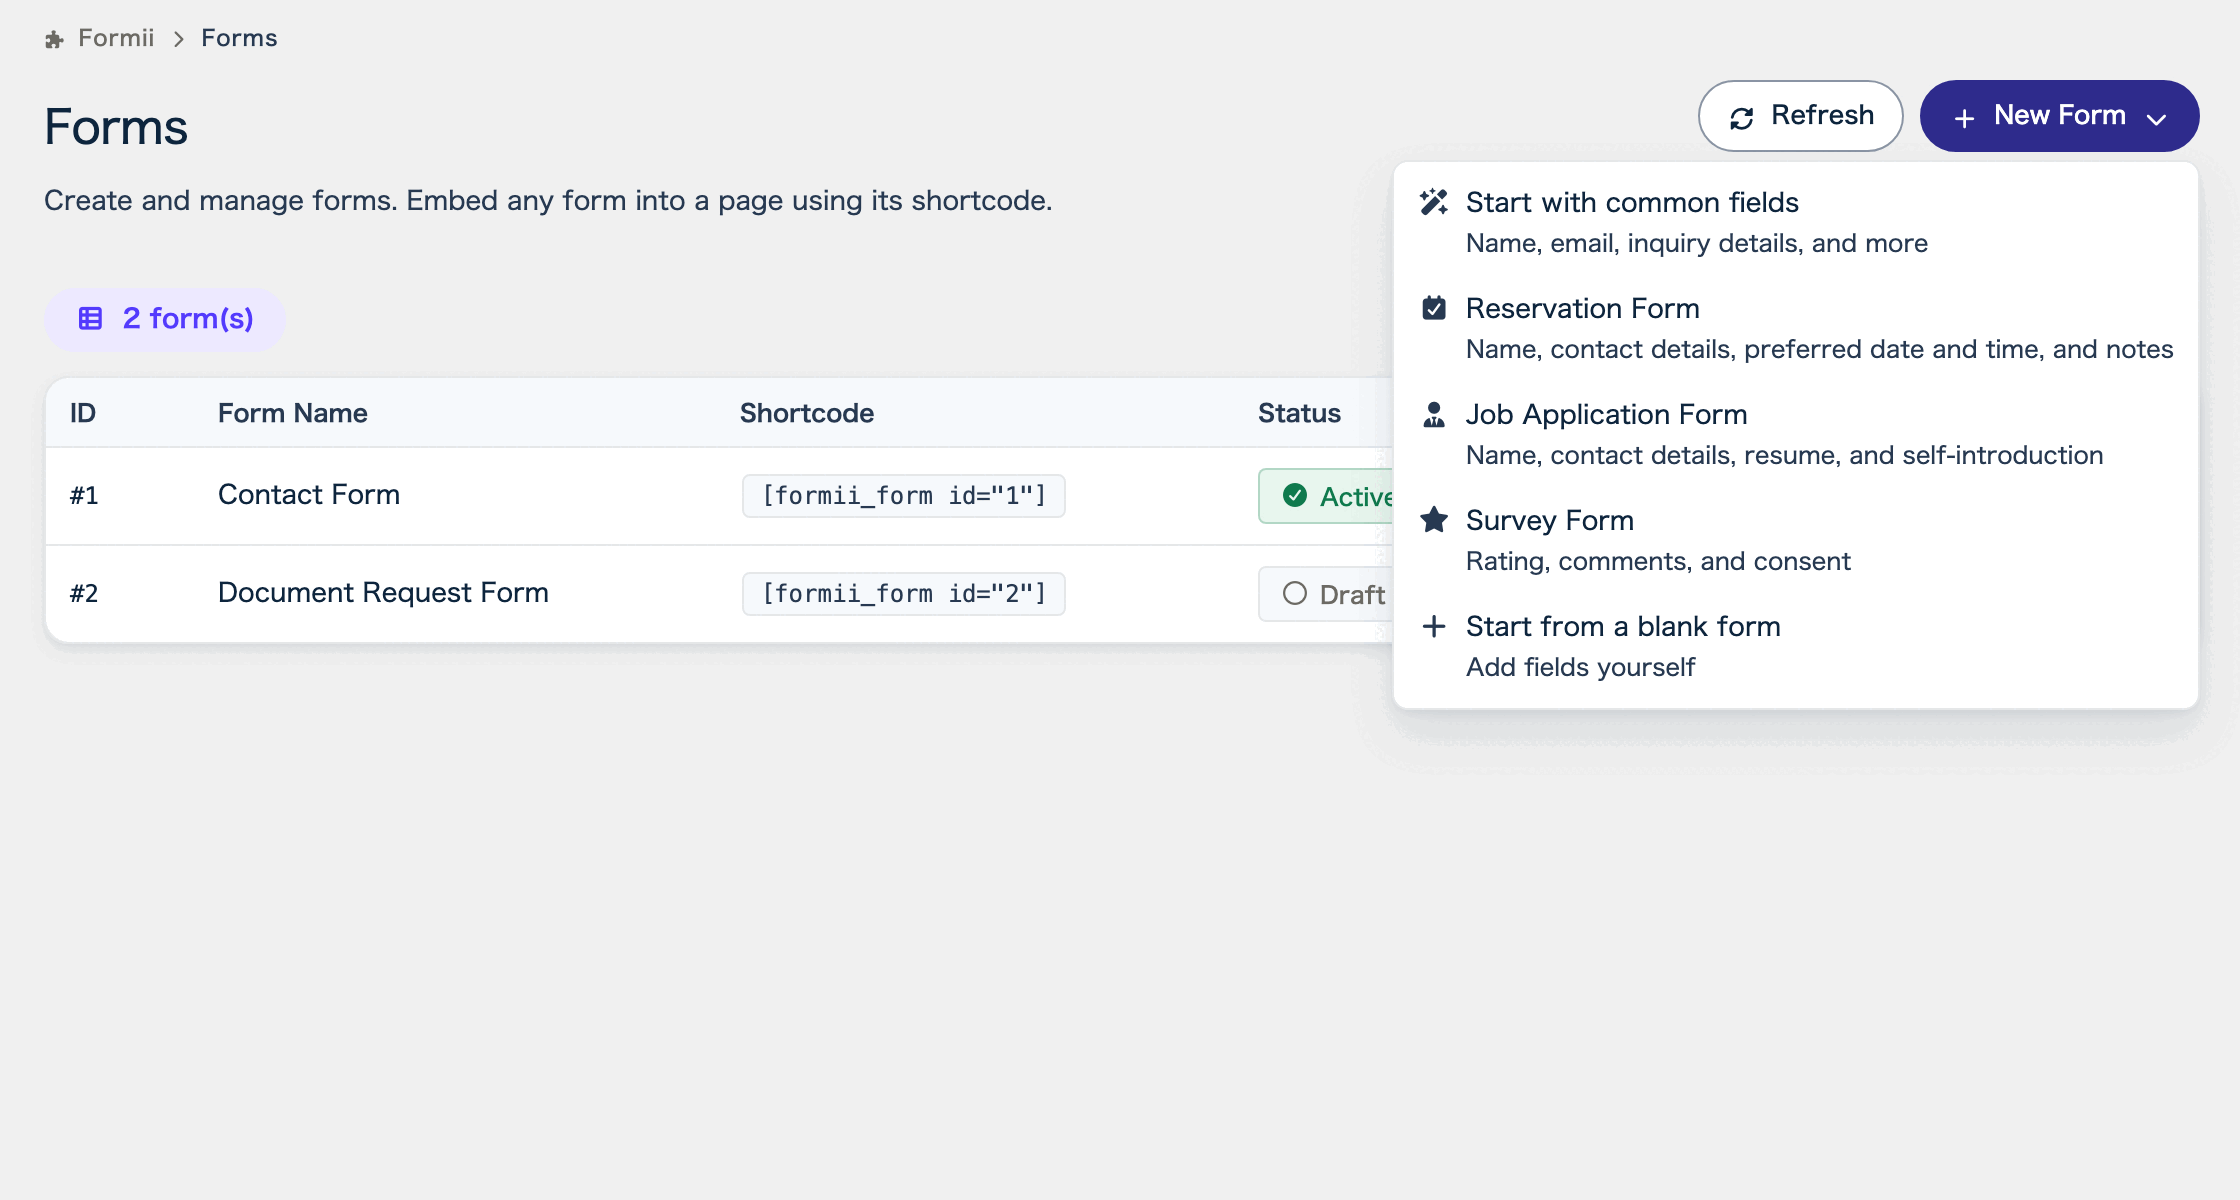
If you use Formii Pro, templates made only of fields your plan includes also appear in the menu. There are three: Reservation Form, Job Application Form, and Survey Form.
Fields added by “Start with common fields”
The form is named “Contact Form”, and these fields are added in order.
- “Full Name” (two inputs, for last and first name)
- “Furigana” (added only when the site language is Japanese)
- “Email Address”
- “Inquiry Details” (a multi-line input)
- “Privacy Policy” (a consent checkbox)
Except for “Furigana”, these four fields are required. Reordering and configuring fields explains how to add or delete fields and change their settings.
A new form starts as a draft
The publication status of a new form is “Draft”. A draft form is not shown to visitors and does not accept submissions.
Previewing, publishing, and saving drafts explains how to publish a form.
Rename a form
A form created with “Start from a blank form” is named “New Form”. With “Start with common fields”, it is named “Contact Form”. You can change the name in the editor.
- Type the new name in the “Form name” field at the top of the editor.
- Click “Save Form” at the top right.
How to read the Forms list
Your forms appear in a table on the Forms screen. The table has these columns.
- “ID” and “Form Name”
- “Shortcode”: the code you paste into a page.
- “Status”: shows “Active” or “Draft”. Click it to switch.
- “Updated”
- “Actions”: the “Edit” and “Delete” buttons.
To remove a form, click “Delete”. A confirmation message appears and tells you the action cannot be undone. Inquiries already received through that form stay, and are marked “(Deleted)”.
FAQ
- How many forms can I create?
- There is no limit. You can create as many forms as you need. Each form gets its own shortcode.
- Is a new form published right away?
- No. A new form starts as a draft. To publish it, switch the status to “Active” and add the form to a page.
- Can I change a form’s name or fields later?
- Yes. Click “Edit” on the Forms screen to open the editor. You can change the name and the fields there.
Related articles
- Field types
- Reordering and configuring fields
- Confirmation screen before submission
- Previewing, publishing, and saving drafts
Formii is free to get started
The confirmation screen and inquiry management are included in the free version.